Siding Repair Contractor Guide
Siding repair contractor services are crucial for maintaining the aesthetic and structural integrity of your home. Different siding materials require specific repair techniques, and understanding these methods can help you make informed decisions. This guide covers everything from identifying damage to choosing a qualified contractor and ensuring a successful repair.
Whether you’re dealing with cracked vinyl, rotting wood, or damaged fiber cement, this comprehensive overview will equip you with the knowledge to navigate the siding repair process effectively. We’ll explore the various repair methods, cost considerations, and crucial steps for a smooth and lasting repair.
Introduction to Siding Repair Contractors
Siding repair contractors specialize in restoring and maintaining the exterior siding of homes and buildings. This crucial service ensures the structural integrity and aesthetic appeal of the property, while also potentially increasing its value. Effective siding repair prevents further damage and costly replacements down the line.
Siding repair services encompass a wide range of tasks, from patching small holes and replacing damaged boards to complete siding overhauls. This includes assessment, diagnosis, and the execution of repair work tailored to the specific needs of each property.
Types of Siding Materials Commonly Repaired
Various materials are used for exterior siding, each with unique characteristics and repair requirements. Common types include vinyl, wood, fiber cement, and metal. Understanding the material’s properties is essential for determining the most appropriate repair method. Vinyl siding, for instance, is often susceptible to dents and scratches, while wood siding can be vulnerable to rot and insect infestation. Fiber cement siding is more resistant to these issues, but still requires proper maintenance and repair. Metal siding, particularly aluminum or steel, often needs repair due to impacts or weathering.
Common Reasons for Siding Repair
Several factors can lead to the need for siding repair. Damage from storms, such as hail or high winds, is a frequent cause. Exposure to the elements, including rain, snow, and sun, can cause deterioration over time. Furthermore, pest infestations and structural issues can compromise the siding’s integrity. In some cases, improper installation can also necessitate repairs.
Siding Repair Techniques Comparison
Different techniques are employed for siding repair, each with its own set of advantages and disadvantages. Choosing the right technique depends on the severity of the damage, the type of siding, and the budget. The following table provides a comparative overview:
| Technique | Description | Advantages | Disadvantages |
|---|---|---|---|
| Patching | Repairing small damages like holes or cracks with a matching material. | Cost-effective, minimal disruption. | Suitable only for minor damage, may not be aesthetically pleasing for larger areas. |
| Replacement of Damaged Boards | Replacing individual damaged boards with new ones. | Maintains the original aesthetic of the siding. | Can be time-consuming, more expensive than patching. |
| Complete Siding Overhaul | Replacing the entire siding system. | Addresses all damage and provides a fresh, updated appearance. | Most expensive option, requires extensive planning and labor. |
| Siding Restoration | Refinishing existing siding to improve its appearance and protect it from the elements. | Cost-effective, can preserve the existing siding. | Effectiveness depends on the condition of the siding, may not be appropriate for severe damage. |
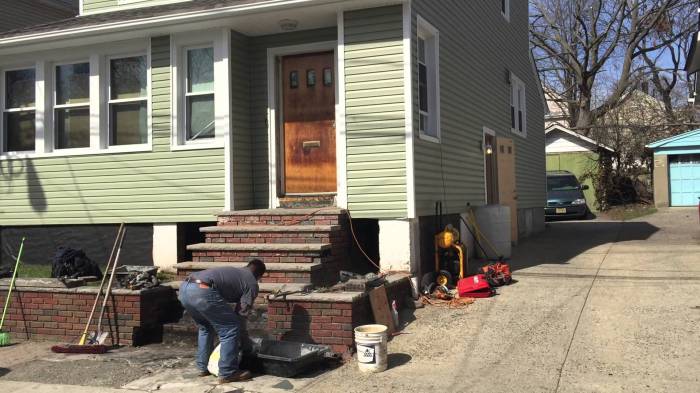
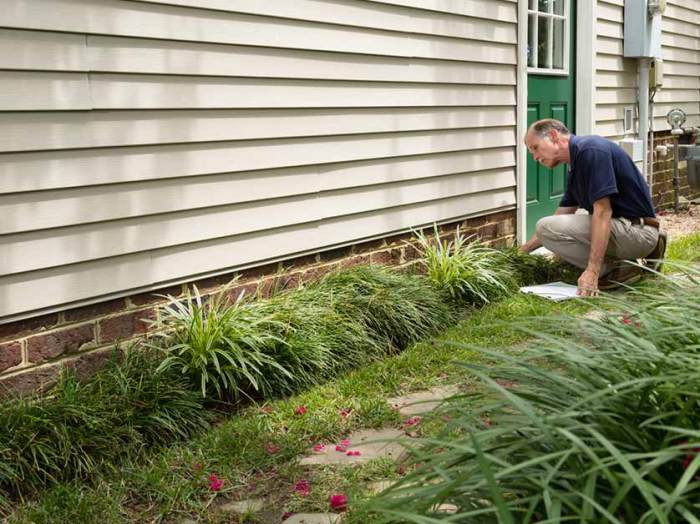
Identifying Needs for Siding Repair

Source: morrisrenovations.com
Choosing the right siding repair contractor is crucial for a successful and cost-effective outcome. Proper assessment of the damage is essential to determine the necessary repairs and avoid future issues. This section provides guidance on evaluating your needs and potential costs.
Homeowners often face challenges during siding repair, ranging from finding qualified contractors to managing the complexities of the process. Understanding the factors involved in selecting a contractor, assessing the damage, and navigating common issues can significantly ease the process.
Factors to Consider When Choosing a Siding Repair Contractor
Selecting a reputable and qualified siding repair contractor is paramount to a successful project. Look for contractors with a proven track record, strong references, and a clear understanding of various siding materials. Consider their experience with the specific type of siding on your home, as expertise in certain materials can affect the quality and longevity of the repairs. Licensing and insurance are also crucial; ensure the contractor holds the necessary licenses and carries appropriate liability insurance to protect you from potential issues. Finally, get multiple estimates to compare pricing and services before making a decision.
Assessing the Extent of Siding Damage
A thorough inspection is vital to accurately determine the extent of the damage. Begin by visually inspecting all areas of the siding, paying close attention to any cracks, gaps, missing pieces, or discoloration. Document the location and severity of each issue using photos or a detailed written description. Assess the cause of the damage—weather-related issues, pests, or other factors—as this can influence the repair strategy and the long-term maintenance of your siding. If the damage is extensive or you’re unsure about the cause, consulting a professional is recommended.
Common Problems Homeowners Face During the Repair Process
Several challenges can arise during the repair process. One common issue is unexpected cost increases, which can occur due to unforeseen complications or material shortages. Communication breakdowns between the homeowner and contractor can lead to misunderstandings and delays. Ensuring clear communication and a well-defined contract are vital to avoid these issues. Poor workmanship is another potential problem, resulting in uneven repairs or substandard materials. Thorough inspections throughout the process and careful contract review are important to address this concern.
Siding Repair Costs
The cost of siding repair varies significantly based on the type of material, the extent of the damage, and the labor involved. The following table provides a general estimate of repair costs. Note that these are estimations and actual costs may vary based on specific circumstances.
| Material | Labor Cost (per square foot) | Material Cost (per square foot) | Total Estimated Cost |
|---|---|---|---|
| Vinyl Siding | $5 – $10 | $2 – $4 | $7 – $14 |
| Fiber Cement Siding | $8 – $15 | $3 – $6 | $11 – $21 |
| Wood Siding | $10 – $20 | $4 – $8 | $14 – $28 |
Contractor Selection and Evaluation
Choosing the right siding repair contractor is crucial for a successful and lasting project. A qualified contractor will not only handle the repair effectively but also ensure the work is done according to your specifications and within a reasonable timeframe. Thorough research and careful evaluation are essential steps in this process.
Finding Qualified Contractors
Finding reliable siding repair contractors involves a multi-faceted approach. Online resources like online business directories, review websites, and local home improvement websites can be valuable starting points. Networking with friends, family, or neighbors who have recently had siding work done can also provide leads. Checking with local home improvement stores or construction companies can yield additional potential candidates. Word-of-mouth referrals are frequently trusted and reliable sources.
Checking Licenses and Insurance, Siding repair contractor
Valid contractor licenses and appropriate insurance coverage are critical indicators of a contractor’s trustworthiness and financial stability. A contractor’s license verifies their legal right to perform contracting work in the area. Insurance protects you from financial loss in case of accidents or property damage during the project. Ensure the contractor carries liability insurance, covering potential damages to your property or injuries to the contractor or their employees. Always verify the validity of these documents through the appropriate licensing and insurance agencies.
Evaluating Potential Contractors
A thorough evaluation of potential contractors involves a structured approach. This ensures you select a qualified professional who can meet your specific needs. Here’s a checklist to guide you through the evaluation process:
- References: Request references from previous clients to gain insights into the contractor’s work ethic, communication skills, and adherence to timelines. Inquire about the quality of work, professionalism, and problem-solving skills.
- Portfolio: Review the contractor’s portfolio to assess their experience and skill level. Look for examples of siding repair projects similar to what you need. Observe the quality of workmanship, attention to detail, and adherence to specifications.
- Estimates: Request detailed estimates from multiple contractors. Compare the pricing and scope of work to determine the best value for your money. Ensure the estimates include all necessary materials, labor costs, and any potential add-on charges.
- Communication: Assess the contractor’s communication style. A clear and responsive contractor will make the process smoother and ensure your concerns are addressed promptly. Look for prompt responses to your inquiries and a clear understanding of your project goals.
- Reputation: Research the contractor’s reputation online through review platforms and local community forums. Pay attention to the feedback and reviews provided by previous clients.
Contractor Certifications
Recognizing and understanding contractor certifications can enhance your selection process. Different certifications signify varying levels of expertise and commitment to quality standards.
| Certification | Description | Benefits |
|---|---|---|
| Certified Siding Professional (CSP) | A certification signifying expertise in siding installation and repair, often demonstrating knowledge of various siding materials and installation techniques. | Increased confidence in the contractor’s skills, higher quality work, and adherence to industry standards. |
| Licensed General Contractor (LGC) | A license signifying a contractor’s legal authorization to perform contracting work in a specific region. | Legal compliance and assurance that the contractor is authorized to perform the work. |
| Insurance Verification | Verification of liability and workers’ compensation insurance, ensuring protection in case of accidents or property damage. | Financial security and protection for both the homeowner and the contractor. |
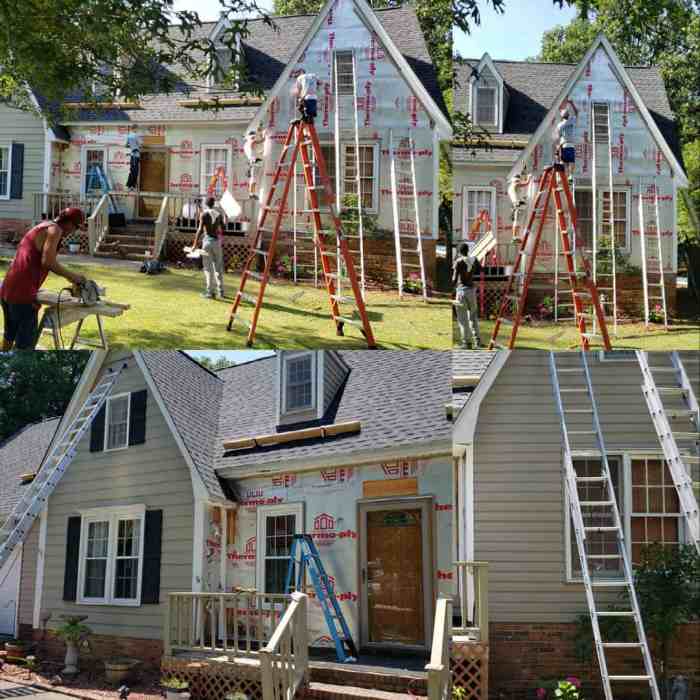
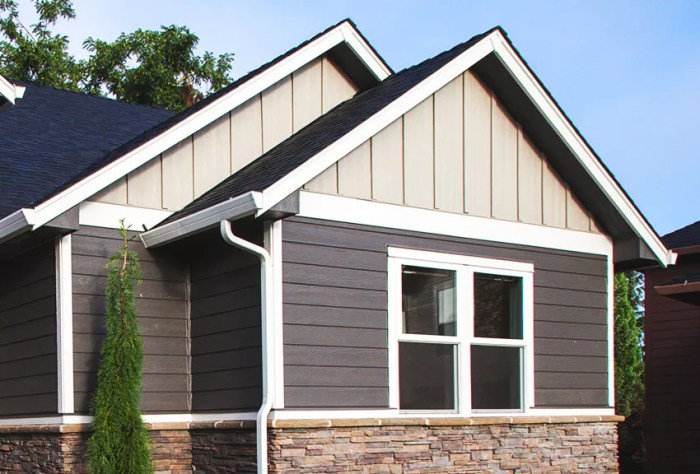
Preparing for Siding Repair

Source: jrs-painting.com
Proper preparation is crucial for a successful and efficient siding repair project. This involves more than just gathering materials; it encompasses careful planning, safety measures, and meticulous execution. A well-prepared project minimizes potential issues, reduces repair time, and ensures a high-quality end result.
Site Preparation
Thorough site preparation is essential to ensure a clean and safe work environment. This includes clearing the area around the damaged siding, removing any debris, and securing surrounding landscaping or structures to prevent damage during the repair process. Proper site preparation minimizes disruption to the surrounding area and protects the work crew. Consider the use of tarps to cover nearby areas that might be affected by debris or construction materials.
Material Storage
Efficient material storage is vital for a smooth repair process. Proper storage protects materials from the elements and ensures easy access during the repair. Materials should be stored off the ground to prevent moisture damage. Organize materials by type and use clearly labeled containers or designated areas for each component. This will significantly improve efficiency and reduce the risk of errors.
Safety Precautions
Safety is paramount during any home repair project. Strict adherence to safety guidelines is critical to preventing accidents and injuries. All workers involved in the siding repair should wear appropriate safety gear, including eye protection, work gloves, and sturdy footwear. Ensure that the work area is well-lit and free of obstructions to minimize the risk of falls or other hazards. It is important to have a first aid kit readily available and to have someone aware of the work being performed, in case of an emergency.
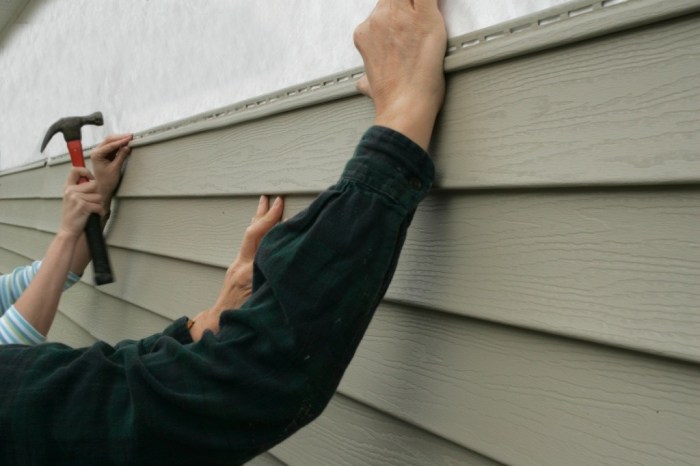
Damaged Siding Removal Procedure
Removing damaged siding requires a systematic approach to ensure safety and efficiency. The following steps Artikel a procedure for removing damaged siding safely and effectively.
- Assessment and Planning: Carefully inspect the damaged siding area to identify the extent of the damage and the type of siding. Develop a plan to remove the damaged sections, considering the structural integrity of the house and the surrounding area.
- Safety Gear: Equip all workers with necessary safety gear, including safety glasses, work gloves, and sturdy footwear. Use appropriate fall protection if working at heights.
- Support and Protection: Secure the area around the siding repair to prevent damage to surrounding structures or landscaping. Use appropriate scaffolding or ladders to prevent falls. Cover nearby areas to prevent debris from falling on them.
- Removing Damaged Sections: Carefully remove the damaged siding sections, following the established plan. Use appropriate tools and techniques to minimize damage to the surrounding areas.
- Cleaning and Disposal: Clean the area where the siding was removed. Dispose of damaged siding materials responsibly and in accordance with local regulations.
- Inspection and Verification: Thoroughly inspect the area to ensure the siding removal was completed safely and without damaging the underlying structure. Verify that the removal was conducted as per the plan.
Siding Repair Process and Methods: Siding Repair Contractor
A crucial aspect of siding repair involves understanding the various methods employed to address different types of damage and ensure a durable and aesthetically pleasing result. Proper repair techniques not only restore the siding’s appearance but also maintain the structural integrity of the home. Addressing issues promptly can prevent further damage and costly replacements.
Different siding types require specific repair methods. Understanding these methods ensures the repair is effective and complements the existing siding. This detailed guide will walk you through the common methods for various siding types, including the steps involved, material considerations, and critical post-repair steps like insulation.
Repair Methods for Different Damage Types
Various types of damage necessitate different repair techniques. The severity and nature of the damage dictate the chosen repair approach. For example, a small crack in vinyl siding can be addressed with a simple patching solution, whereas a large section of damaged wood siding might require replacement.
- Minor Damage (e.g., small cracks, loose panels): Repairing minor damage often involves patching or caulking. This method is cost-effective and suitable for preserving the existing siding. For vinyl siding, a suitable patching compound and a putty knife are used. For wood siding, a wood filler and appropriate sealant are the typical choices. Careful preparation of the damaged area is key to ensuring a long-lasting repair.
- Moderate Damage (e.g., significant cracks, missing panels): For more extensive damage, partial or complete section replacement may be necessary. This approach involves removing the damaged sections, preparing the area for new siding, installing new panels, and ensuring a proper seal. The exact steps will depend on the type of siding and the nature of the damage. For example, replacing a damaged section of fiber cement siding requires careful removal of the damaged section, priming the surface, and securing the new section with appropriate fasteners.
- Severe Damage (e.g., rot, water damage, significant structural damage): In cases of significant damage like rot or extensive water damage, the entire siding section might need replacement. Replacing the damaged sections involves more extensive preparation, including removing the damaged areas, addressing underlying structural issues (if any), and installing new siding panels. It’s crucial to consult a professional contractor in situations like these, especially when water damage is suspected to prevent further issues.
Steps Involved in Replacing Damaged Siding Sections
Replacing damaged siding sections requires meticulous planning and execution to ensure a strong and watertight seal. A step-by-step approach guarantees a professional-looking and long-lasting repair.
- Assessment and Planning: Carefully assess the extent of damage and determine the necessary repairs. This includes identifying the type of siding, the amount of material needed, and the required tools and equipment. Detailed documentation of the damage and its location is essential.
- Preparation: Carefully remove the damaged siding sections, ensuring the underlying structure is sound. Proper preparation involves cleaning the area, removing any debris, and ensuring the surface is ready for the new siding. This often includes priming the area to ensure proper adhesion.
- Installation: Install the new siding sections using appropriate fasteners and techniques. The installation should adhere to the manufacturer’s recommendations for the specific siding type. The new siding should fit snugly against the existing siding.
- Sealing: Apply a sealant to all joints and seams to create a watertight seal. This is crucial to prevent water intrusion and protect the underlying structure from moisture damage. A quality sealant is vital for a long-lasting repair.
Ensuring a Proper Seal After Repair
A crucial step in siding repair is achieving a watertight seal to prevent future problems. Proper sealing prevents moisture from penetrating the structure and causing rot, mildew, or other damages. A well-sealed repair will increase the longevity of the siding and protect the home.
- Using appropriate sealants: Select sealants that are compatible with the type of siding. For instance, vinyl siding requires specific sealants to avoid degradation or discoloration.
- Caulking and weatherstripping: Apply caulking and weatherstripping around windows and doors to prevent air and moisture leaks.
- Checking for gaps and cracks: Carefully inspect the repaired area for any gaps or cracks. Fill any openings to ensure a complete seal. A thorough inspection is crucial.
Comparison of Siding Repair Materials
Different materials offer various advantages and disadvantages in siding repair. The choice depends on the type of siding, the extent of damage, and the desired aesthetic.
| Material | Advantages | Disadvantages |
|---|---|---|
| Vinyl | Low maintenance, durable, affordable | Can warp in extreme temperatures |
| Wood | Natural look, customizable | Requires regular maintenance, prone to rot |
| Fiber Cement | Durable, long-lasting, resistant to rot | More expensive than vinyl or wood |
Proper Insulation Techniques After Repair
Proper insulation is vital for energy efficiency and comfort after any siding repair. This is especially true for older homes, as outdated insulation may have deteriorated. Adding or improving insulation after siding repair can reduce energy costs and improve indoor comfort.
- Insulation type: Choose insulation that aligns with the building codes and the local climate. Examples include fiberglass, cellulose, or spray foam.
- Proper installation: Install insulation correctly to avoid gaps and ensure adequate coverage. Following manufacturer instructions is critical.
- R-value considerations: Consider the R-value of the insulation to achieve optimal energy efficiency.
Post-Repair Considerations
Completing siding repair is just the first step in ensuring a long-lasting, attractive exterior. Thorough follow-up and preventative measures are crucial for maximizing the lifespan of your new siding and avoiding future problems. This section details key post-repair considerations, from inspections to maintenance tips.
Post-repair considerations extend beyond simply fixing the damaged siding. They encompass preventative strategies to ensure the longevity of the repair and the overall structural integrity of your home. A proactive approach to maintenance and dispute resolution can save you headaches and ensure satisfaction with the completed work.
Follow-up Inspections
Regular follow-up inspections are essential to verify the quality of the repair and catch any potential issues early. These inspections should not be limited to just the initial repair site, but should also include the surrounding areas to detect any signs of further damage or settling. This proactive approach can identify issues before they escalate into significant problems.
Maintaining Repaired Siding
Proper maintenance is critical to preserving the repaired siding and extending its lifespan. Regular cleaning, sealing, and inspection will help maintain the integrity of the repair and prevent future issues. Addressing any minor issues promptly can prevent more extensive and costly problems.
- Cleaning: Regular cleaning, ideally with mild detergent and a soft brush, removes dirt and debris that can accumulate and cause discoloration or accelerate deterioration.
- Sealing: Periodic sealing with a suitable exterior sealant helps to protect the siding from moisture penetration, UV damage, and pests, preserving the repair’s longevity.
- Inspecting for Damage: Regular visual inspections of the entire siding system can identify any signs of deterioration, loose or damaged panels, or other issues. Addressing these problems promptly will prevent further damage.
Preventing Future Siding Damage
Proactive measures can prevent future siding damage and extend the lifespan of your home’s exterior. Understanding common causes of siding damage, such as moisture, pests, and impact, allows you to take steps to prevent them. This proactive approach will save you time and money in the long run.
- Regular Maintenance: Establishing a routine for cleaning, sealing, and inspecting the siding can prevent the accumulation of moisture, mold, or mildew.
- Addressing Gutters and Drainage: Ensuring proper drainage around the house prevents water from accumulating against the siding, which can lead to rot and damage.
- Protecting from Pests: Implementing pest control measures, including professional treatments if needed, can help prevent damage from insects and rodents.
Resolving Disputes with Contractors
Disputes with contractors are sometimes unavoidable. Maintaining clear communication, documentation, and adhering to a written contract can significantly mitigate these conflicts. Early intervention and open dialogue can resolve many issues amicably.
- Clear Communication: Open and timely communication about any concerns or issues can help prevent disagreements from escalating.
- Written Documentation: Maintain records of all communication, including emails, text messages, and any verbal agreements.
- Contract Review: Carefully review the contract with the contractor to understand your rights and responsibilities, ensuring all aspects of the agreement are clearly defined.
Checklist for Inspecting the Completed Repair
A comprehensive checklist for inspecting the completed repair will help ensure all aspects of the work meet your expectations and standards. This systematic approach will help you verify the quality and completeness of the repair.
| Item | Criteria |
|---|---|
| Repair Area | Inspect for proper alignment, color matching, and overall finish quality. Check for any gaps, imperfections, or mismatched materials. |
| Surrounding Areas | Ensure that the repair area blends seamlessly with the surrounding siding. Verify that there are no signs of water damage or leaks around the repaired area. |
| Contractor’s Workmanship | Examine the contractor’s work for quality and adherence to agreed-upon standards. |
Siding Repair Case Studies
Understanding successful and problematic siding repair projects provides valuable insights into common issues and best practices. Analyzing these case studies helps contractors refine their approach and ensure client satisfaction. Thorough documentation of each project, from initial assessment to final results, is crucial for continuous improvement.
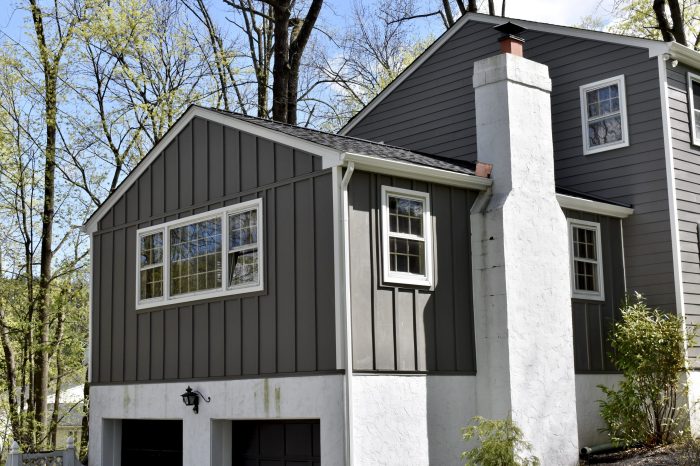
Successful Siding Repair Project
A recent project involved repairing damaged vinyl siding on a two-story home. The initial assessment identified rotted and warped sections along the bottom half of the house. The contractor carefully removed the damaged siding, ensuring minimal disruption to the surrounding areas. New, high-quality vinyl siding was installed, matching the existing color and style. Proper sealing and flashing were implemented to prevent future water intrusion. The project was completed on schedule and within budget, resulting in a significant improvement to the home’s curb appeal and structural integrity.
Problematic Siding Repair Project
A project involving the replacement of cedar siding on a craftsman-style home faced numerous challenges. The contractor underestimated the extent of the existing damage, leading to delays and cost overruns. Poor communication between the contractor and the homeowner resulted in misunderstandings about the scope of work. Furthermore, the contractor used lower-quality materials than specified, impacting the longevity and aesthetics of the repair. The final product did not meet the homeowner’s expectations, leading to a negative experience and potentially damaging the contractor’s reputation.
Common Causes of Problems During Repair
Several factors can contribute to problems during siding repair. Inaccurate initial assessments can lead to underestimating the extent of damage, resulting in additional costs and delays. Poor communication between the contractor and homeowner can cause misunderstandings about the project scope and timelines. Using subpar materials or inadequate installation techniques compromises the durability and aesthetics of the repair. Inadequate preparation for the project, such as failing to address underlying structural issues, can also cause future problems.
Repair Project Outcomes
| Project | Issues Encountered | Resolution | Outcome |
|---|---|---|---|
| Example Project 1: Vinyl Siding Replacement | Initial assessment underestimated damage; poor communication with homeowner regarding scope of work. | Revised assessment; clear communication with homeowner regarding revised scope, budget, and timeline; use of higher-quality materials. | Project completed on time and within budget; homeowner satisfied with the result, highlighting improved curb appeal and structural integrity. |
| Example Project 2: Cedar Siding Replacement | Contractor underestimated damage; lower-quality materials used; inadequate flashing and sealing; poor communication about timeline. | Revised scope of work to include all affected areas; replacement of lower-quality materials with higher-quality materials; re-evaluation of flashing and sealing; clear communication with homeowner about delays and costs. | Project completed, but significantly delayed and exceeded budget; homeowner was not satisfied, highlighting issues with communication and quality of work. |
| Example Project 3: Fiber Cement Siding Repair | Inadequate preparation for removing old siding; improper caulking and sealing around windows and doors; poor coordination with roofing contractor. | Removal of old siding with proper protection for underlying structures; thorough caulking and sealing; proactive coordination with roofing contractor. | Project completed on time; homeowner reported excellent results with improved water resistance and weather protection; good contractor-client relationship. |
Last Recap
Choosing the right siding repair contractor and understanding the repair process is key to a successful outcome. This guide provides a comprehensive overview of the entire process, from initial assessment to post-repair maintenance. By following the advice presented, you can confidently address siding issues, protect your home’s value, and enjoy a beautiful, well-maintained exterior.