Professional Siding Installation Your Homes Exterior Transformation
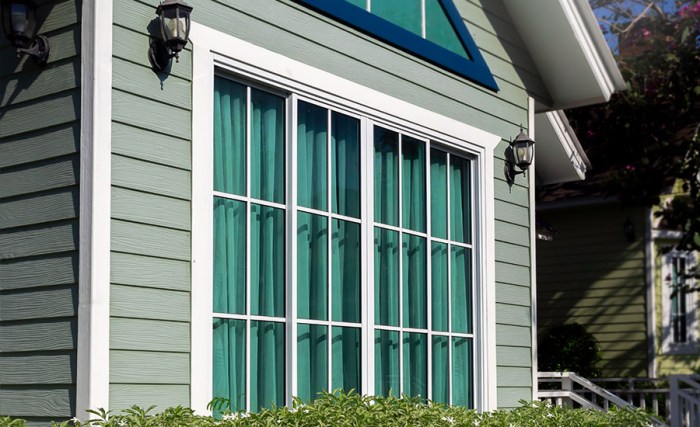
Professional siding installation is the key to transforming your home’s exterior. It’s a significant investment, but one that can dramatically enhance your property’s curb appeal and value. From understanding the different siding materials – like durable vinyl, classic wood, or low-maintenance fiber cement – to the meticulous planning and installation process, we’ll explore the entire journey of a professional siding project. This guide will cover everything from material comparisons to cost breakdowns, ensuring you’re well-equipped to make informed decisions about your home improvement project.
Choosing the right siding for your home involves careful consideration of various factors, including the architectural style of your house, the local climate, and your budget. Understanding the pros and cons of each material will help you select the best option for your needs. We’ll also highlight the benefits of hiring a professional installer, emphasizing the importance of experience and expertise for a flawless outcome.
Introduction to Professional Siding Installation
Professional siding installation is a complex process requiring specialized knowledge and equipment. It involves carefully removing existing siding, preparing the exterior surface, and then installing new siding panels. This process demands precision to ensure a durable, aesthetically pleasing, and weather-resistant finish.
The process typically includes meticulous surface preparation, careful measurement and cutting of materials, and precise application of the siding to achieve a seamless and secure fit. Proper installation is crucial for the long-term performance and structural integrity of the building.
Types of Siding Materials
Various materials are used for siding, each with unique properties. Common choices include vinyl, wood, and fiber cement. These materials vary in their durability, aesthetic appeal, and maintenance requirements.
Benefits of Professional Installation
Hiring a professional siding installer offers significant advantages over DIY installation. Professionals possess the expertise to ensure proper installation, minimizing potential issues like leaks, structural damage, and uneven finishes. Furthermore, their experience and specialized tools contribute to faster and more efficient work, ultimately saving time and effort. This expertise also guarantees adherence to building codes and best practices, ensuring the long-term quality and performance of the siding. The warranty provided by a professional installation company often extends to the work performed, offering further protection against future problems.
Comparison of Siding Materials
| Siding Material | Pros | Cons | Estimated Cost |
|---|---|---|---|
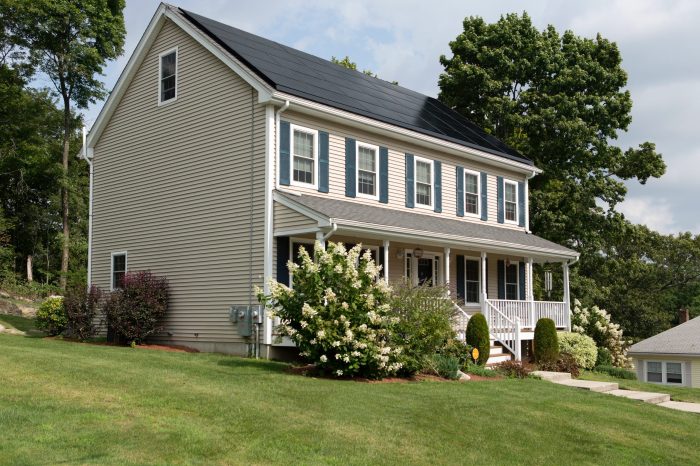
| Vinyl | Low maintenance, wide variety of colors and styles, relatively affordable, resistant to rot and insect damage. | Can be susceptible to dents and scratches, may not be as durable as other materials in extreme weather conditions, limited aesthetic options compared to wood. | $5-$15 per square foot, depending on the complexity of the project and the region. |
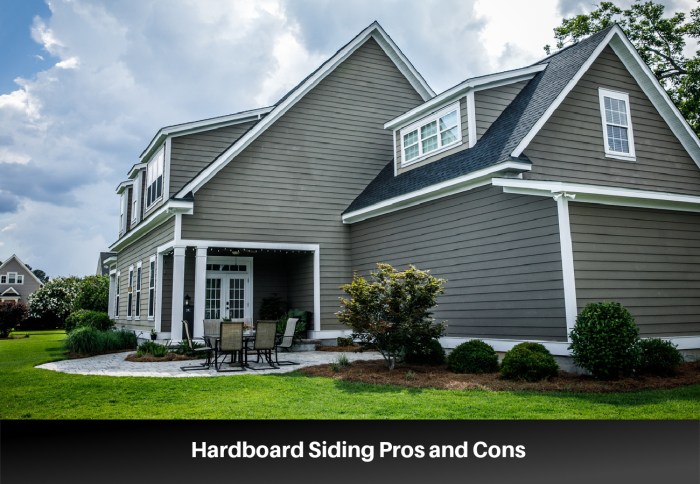
| Wood | Aesthetically pleasing, natural look, excellent insulation properties, can be customized with different finishes and stains. | Requires regular maintenance (staining, sealing), susceptible to rot, insect infestation, and fire damage, more expensive than vinyl. | $8-$20 per square foot, depending on the type of wood and complexity. |
| Fiber Cement | Durable, long-lasting, resistant to rot, insect damage, and fire, very low maintenance, wide range of colors and styles, very durable in extreme weather. | Higher initial cost, can be heavier than other materials, may require specialized installation equipment, less aesthetically varied than wood siding. | $10-$25 per square foot, depending on the complexity of the project and region. |
Planning and Preparation
Source: americanroofing-ks.com
Thorough planning is crucial for a successful siding installation project. Proper preparation minimizes potential issues, ensures efficiency, and ultimately leads to a higher quality final product. This phase involves meticulous site assessment, material selection, and detailed scheduling to mitigate risks and maximize the outcome.
Importance of Pre-Installation Planning
Careful planning minimizes costly rework and delays. A well-defined plan considers the specific building characteristics, weather conditions, and material requirements. It also allows for effective communication with the client and ensures compliance with building codes and regulations. Detailed planning translates to a more streamlined and efficient installation process.
Site Preparation
Effective site preparation is essential for a strong and lasting siding installation. It involves a series of steps that need careful execution. This includes accurately measuring the existing structure, thoroughly cleaning the surface, and removing any old or damaged siding. These steps are crucial to the success of the entire installation process.
Measuring the Existing Structure
Precise measurements are paramount. Errors in measurement can lead to material waste and costly adjustments during installation. Using accurate measuring tools, including tapes, lasers, and levels, is vital. Take multiple measurements at different points to ensure accuracy. Consider variations in the building’s structure, such as angles and architectural details.
Cleaning the Surface
Thorough cleaning of the existing surface is essential for proper adhesion of the new siding. This includes removing loose debris, dirt, and old paint or sealant. Use appropriate cleaning solutions and equipment to avoid damaging the underlying structure. A clean surface ensures a secure and lasting bond for the new siding.
Removing Old Siding
Safe and efficient removal of the old siding is crucial. Proper disposal methods are critical to minimize environmental impact. Use appropriate tools and safety equipment, including gloves, eye protection, and sturdy footwear. This step also reveals any underlying structural issues that may require additional attention.
Necessary Tools and Equipment
The right tools and equipment are vital for a smooth and efficient installation. A well-stocked tool kit ensures a safe and productive work environment. This includes but is not limited to:
- Measuring tools (tapes, levels, laser levels)
- Cleaning equipment (pressure washer, brushes)
- Safety equipment (gloves, safety glasses, hard hats)
- Siding removal tools (pry bars, saws)
- Hand tools (screwdrivers, hammers)
- Power tools (drills, saws)
Pre-Installation Site Assessment Checklist
A comprehensive checklist ensures that all critical aspects of the site are addressed. This systematic approach minimizes errors and ensures that the project meets all safety and quality standards.
| Item | Action | Verification |
|---|---|---|
| Building measurements | Accurate measurements of the structure | Compare multiple measurements; check for inconsistencies. |
| Surface cleaning | Remove loose debris, dirt, and old paint | Visual inspection; ensure no loose particles remain. |
| Old siding removal | Proper removal of old siding | Confirm all old siding is removed and disposed of properly. |
| Structural inspection | Inspect for any underlying structural issues | Note any visible problems for further evaluation. |
| Weather conditions | Assess current and forecast weather conditions | Consult forecasts; note potential rain or wind delays. |
| Material availability | Confirm availability of all necessary materials | Ensure adequate quantities are ordered and on-site. |
Installation Process
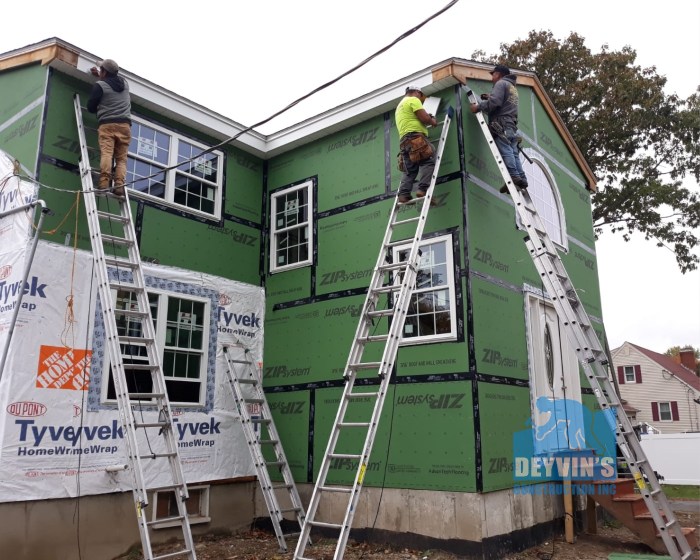
Source: deyvinsroofing.com
The installation process for siding is a critical phase in the project. Proper installation ensures the longevity and aesthetic appeal of the finished product. Careful attention to detail and adherence to manufacturer’s instructions are paramount. A well-executed installation minimizes future issues and maintains the structural integrity of the home.
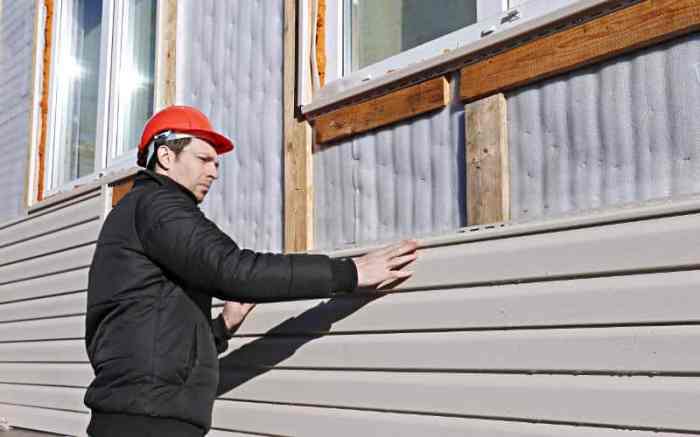
Siding Type-Specific Procedures, Professional siding installation
Different siding materials necessitate unique installation techniques. Understanding these variations is crucial for successful completion. Adherence to the specific requirements of each siding type ensures a durable and aesthetically pleasing outcome.
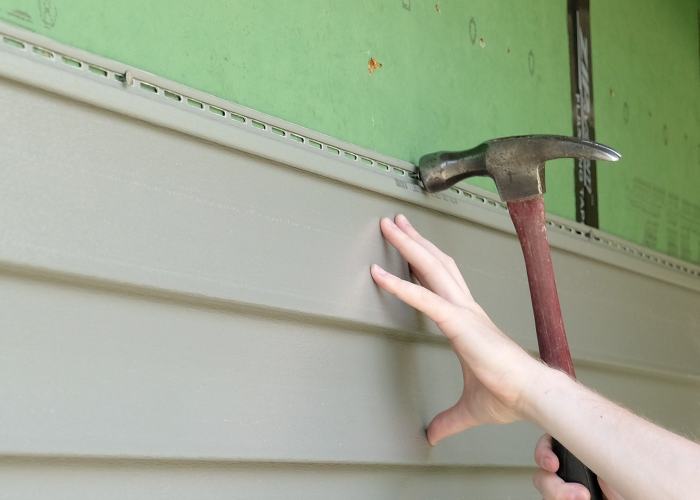
- Vinyl Siding: Vinyl siding, due to its lightweight nature, is often installed using a specialized nailing technique. This method ensures the siding is firmly secured without compromising the material’s integrity. A proper gap between the siding and the house is maintained to allow for expansion and contraction. This helps prevent damage due to temperature fluctuations. Typical installation involves the use of specialized clips or nailing methods that accommodate the material’s flexibility. Properly spaced nailing is key to preventing sagging or warping over time.
- Wood Siding: Wood siding requires careful preparation and installation to maintain its structural integrity and aesthetic appeal. Prior to installation, ensure the wood is properly treated and protected against moisture damage. The nailing method should be precise to prevent damage to the wood. Correct spacing between boards is crucial for proper ventilation. Thorough inspection and treatment of the underlying structure are crucial for long-term preservation of the siding.
- Fiber Cement Siding: Fiber cement siding is a durable option, often installed using a similar approach to vinyl. This durable material can tolerate various installation techniques, while maintaining the integrity of the material and the structural integrity of the home. Careful attention to securing the siding to the house frame is essential for longevity. Properly securing the siding to the supporting structure ensures a stable and long-lasting finish.
Securing Siding to the Structure
Properly securing siding is crucial for the longevity of the installation. This involves more than just nailing; it encompasses the specific needs of each siding type. Appropriate fasteners and installation techniques prevent damage to both the siding and the house structure. Consider the type of fasteners to be used to minimize the potential for material damage.
- Fasteners: The selection of fasteners is critical. Using the correct type and size of nails, screws, or other fasteners, appropriate for the siding material and the underlying structure, prevents issues. Over-tightening or under-tightening can lead to problems. Ensure that fasteners are appropriately sized and suitable for the type of siding material and the underlying structure.
- Flashing: Proper flashing is vital for preventing water damage. This technique involves sealing joints and overlaps to create a watertight barrier. Flashing materials are designed to divert water away from the siding and the underlying structure, preventing leaks and water intrusion. The use of appropriate flashing materials and techniques is essential to protect the house from water damage.
- Installation Techniques: Techniques vary based on siding type. Understanding these variations is crucial to prevent damage. Different siding materials have different requirements for installation, and it is important to understand and follow these requirements for a proper installation. Specific installation techniques for each siding type minimize potential issues.
Common Installation Issues and Resolutions
Recognizing potential problems during the installation process allows for proactive resolution. This ensures the project’s completion within budget and schedule.
- Gaps and Seams: Gaps and seams that are not properly sealed can lead to water damage. Careful attention to sealing and caulking is essential for a watertight installation. Addressing gaps and seams promptly can prevent costly repairs later.
- Warping and Cracking: Warping and cracking can occur due to improper nailing or expansion/contraction issues. Addressing these problems promptly can prevent more significant damage. Proper spacing and nailing techniques minimize the likelihood of warping or cracking.
- Poor Fastener Placement: Incorrect fastener placement can lead to damage. Ensuring proper spacing and placement of fasteners prevents damage to the siding and the underlying structure. Proper placement of fasteners is key to preventing future issues.
Safety Precautions
Safety should be a top priority during siding installation. Following safety precautions minimizes risks and protects workers.
- Fall Protection: Fall protection measures are crucial when working at heights. Appropriate safety equipment and practices are mandatory. Implementing fall protection measures minimizes the risk of serious injury.
- Material Handling: Proper material handling techniques prevent injuries. Utilizing the correct equipment and procedures reduces the risk of accidents. Proper material handling techniques reduce the risk of injury.
- Weather Conditions: Adverse weather conditions can impact installation. Adjusting the project schedule or taking necessary precautions in inclement weather is essential. Working in suitable weather conditions is essential to prevent damage and injury.
Vinyl Siding Installation Steps
A detailed breakdown of the vinyl siding installation process, emphasizing crucial steps and required tools. This table provides a comprehensive overview of the installation process.
| Step | Description | Tools Required |
|---|---|---|
| 1 | Prepare the house surface, ensuring it’s clean, dry, and free of debris. | Utility knife, scraper, cleaning solutions |
| 2 | Install the starter strip and flashing. | Hammer, nails, flashing, starter strip |
| 3 | Install the first course of siding, ensuring proper alignment and spacing. | Measuring tape, level, utility knife, siding nailer, nails |
| 4 | Continue installing subsequent courses, adhering to manufacturer’s specifications. | Same as step 3 |
| 5 | Seal all seams and overlaps with caulk. | Caulk gun, caulk |
| 6 | Install the trim and accessories as needed. | Trim pieces, screws, appropriate fasteners |
Quality Control and Finishing
Achieving a professional-looking siding installation hinges on meticulous quality control throughout the process. This final stage ensures the project meets the highest standards and client expectations. Careful attention to detail during installation, along with effective finishing touches, is critical for long-term performance and aesthetic appeal.
High-quality siding installations require a methodical approach to ensure consistent results and prevent costly rework later. This includes adhering to precise measurements, using appropriate fasteners, and maintaining consistent material application.
Importance of Quality Control
Thorough quality control measures prevent costly mistakes and ensure the siding installation meets project specifications and client expectations. This meticulous attention to detail protects the integrity of the installation and safeguards against future issues, such as leaks, structural problems, or aesthetic concerns. By implementing a robust quality control process, contractors can minimize the likelihood of defects and maintain a positive reputation.
Steps for Achieving a Professional Finish
A professional finish involves meticulous attention to detail at each stage of the installation. This includes careful alignment of siding panels, proper sealing of seams, and precise application of trim. Accurate measurements, correct panel positioning, and consistent material application are essential to achieving a flawless appearance. The correct use of caulk, sealants, and flashing prevents water intrusion and ensures a watertight installation.
Addressing Minor Imperfections
Minor imperfections are inevitable in any construction project. Addressing these issues promptly and effectively is crucial for maintaining the quality of the work. For example, a slightly misaligned panel can be repositioned with the right tools and techniques. Small gaps or inconsistencies in the siding can be filled with appropriate caulk or sealant. A detailed checklist ensures each step is performed meticulously.
Final Inspections and Customer Walkthroughs
Final inspections and customer walkthroughs are vital for ensuring client satisfaction and providing an opportunity for feedback. These inspections should involve a comprehensive review of the installation, checking for any discrepancies or imperfections. Open communication with the client during the walkthrough ensures a smooth transition from the installation phase to the project’s completion. This is a critical step in fostering trust and rapport with the customer.
Comparison of Trim Types and Applications
Different types of trim offer varying aesthetic and functional advantages. A detailed understanding of their characteristics and applications is essential for making informed choices.
- Wood Trim: Wood trim adds a classic touch to siding installations. Its natural beauty enhances the aesthetics of the home. However, wood trim requires regular maintenance to prevent rot and decay. Matching the wood species to the home’s existing architectural style is important for aesthetic harmony. Careful selection and application are crucial to achieve a cohesive and visually appealing finish.
- Vinyl Trim: Vinyl trim offers a low-maintenance alternative to wood. Its durability and resistance to weather elements make it suitable for a variety of siding applications. It is readily available in a wide range of colors and styles to match various siding materials and home designs. Installation techniques for vinyl trim should be followed meticulously for optimal results.
- Aluminum Trim: Aluminum trim provides an attractive, durable option for siding. Its resistance to corrosion and its long-lasting finish make it a good choice for both residential and commercial projects. The precise application of aluminum trim requires careful measurement and adherence to manufacturer guidelines.
Careful consideration of the specific trim type, its application, and the overall aesthetic of the home is vital.
Troubleshooting and Maintenance
Source: agrroofingandconstruction.com
Post-installation maintenance is crucial for ensuring the longevity and performance of your siding. Addressing minor issues promptly prevents them from escalating into costly repairs or compromising the structural integrity of your home. Proactive maintenance also enhances the aesthetic appeal and value of your property.
Common Post-Installation Problems
Post-installation inspections are vital for identifying and rectifying potential issues. Common problems include gaps, leaks, and damage, often stemming from improper installation or environmental factors. Early detection and resolution are key to preventing further damage and maintaining the siding’s structural integrity.
Gaps in Siding
Gaps in siding can occur due to improper installation, expansion and contraction of materials with temperature fluctuations, or settling of the house. Addressing gaps promptly prevents water intrusion, pest infestation, and structural deterioration. Proper caulking and weatherstripping are often the solutions.
Leaks
Leaks in siding can originate from various sources. Poorly sealed joints, damaged flashing, or inadequate drainage can all contribute to leaks. Identifying the source of the leak is crucial for effective repair. Professional assessment is essential for complex leak issues.
Damage to Siding
Siding damage can result from impacts, extreme weather conditions, or inadequate maintenance. Damaged panels should be replaced promptly to prevent further deterioration and maintain the siding’s overall aesthetic. Thorough inspection and appropriate repairs are necessary.
Regular Maintenance Tips
Regular maintenance is essential to prevent future problems. Inspecting the siding regularly for any signs of damage or deterioration is paramount. Promptly addressing any issues will help maintain the siding’s structural integrity and aesthetic appeal. Ensuring proper drainage around the foundation and gutters is also important.
Preventing Future Issues
Preventing future issues requires a proactive approach. Using high-quality materials and employing proper installation techniques are key to minimizing problems. Regular inspections and prompt repairs are essential for long-term siding maintenance.
Table of Common Siding Problems and Solutions
| Problem | Cause | Solution |
|---|---|---|
| Gaps | Improper installation, material expansion/contraction, house settling | Caulking, weatherstripping, and/or re-installation of affected sections. |
| Leaks | Poorly sealed joints, damaged flashing, inadequate drainage | Repair or replace damaged flashing, seal joints with waterproof sealant, ensure proper gutter and downspout functionality. |
| Damage | Impact, extreme weather conditions, improper maintenance | Replace damaged panels, repair or reinforce damaged areas, ensure proper drainage and ventilation. |
Cost and Materials
Understanding the costs associated with siding installation is crucial for homeowners planning a project. This involves evaluating material prices, labor expenses, and potential financing options. Accurate cost estimations are essential for budgeting and making informed decisions.
The price of siding projects varies significantly depending on factors such as the type of siding, the size of the project, and the region. Accurate cost breakdowns are critical for homeowners to understand and plan effectively.
Material Costs for Various Siding Types
Different siding materials have varying price points. The cost per square foot fluctuates depending on factors like material availability, demand, and regional market conditions.
- Vinyl siding is typically a more budget-friendly option. Its durability and low maintenance requirements make it a popular choice for many homeowners.
- Fiber cement siding provides superior durability and weather resistance, often at a higher price point compared to vinyl. Its long lifespan and aesthetically pleasing finish justify the increased cost for many homeowners.
- Wood siding, while visually appealing, is often the most expensive option. Its natural beauty comes with higher maintenance requirements and susceptibility to weather damage.
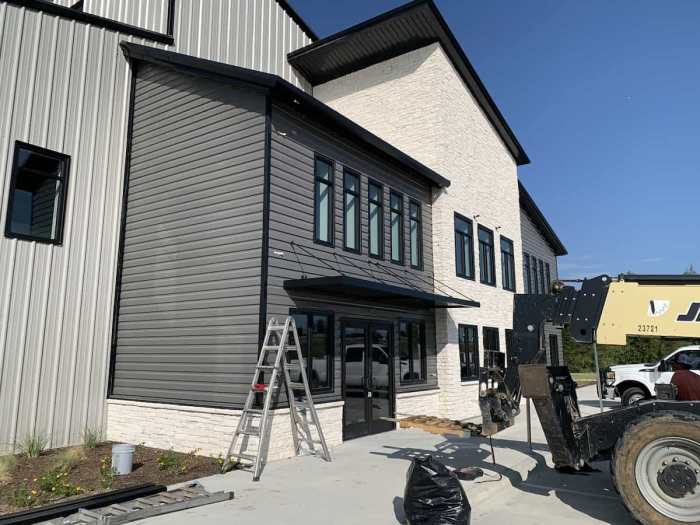
- Metal siding, including steel and aluminum, offers exceptional durability and weather resistance, though installation costs and material prices can vary.
Labor Costs for Professional Installation
Professional installation significantly impacts the overall project cost. Labor costs depend on factors like the installer’s experience, the complexity of the project, and regional labor rates.
- Experienced installers with specialized tools and equipment often command higher hourly rates than less experienced contractors.
- Projects involving extensive repairs or complicated architectural features may require additional labor hours, leading to higher overall costs.
- Regional variations in labor costs are substantial and must be considered in project budgeting.
Factors Influencing Pricing
Several factors influence the total cost of a siding installation project. Homeowners need to understand these variables for accurate budgeting.
- Project size and scope: Larger projects with extensive repairs or complex designs will naturally command higher prices.
- Material availability and market conditions: Fluctuations in material prices and regional availability influence total project costs.
- Installer’s experience and reputation: Reputable and experienced installers often have higher hourly rates, which impact overall project costs.
- Permitting and inspection fees: Local regulations may require permits and inspections, adding to the overall project expenses.
Financing Options for Siding Projects
Financing options for siding projects provide homeowners with flexibility in managing their budget. These options can often significantly reduce upfront costs.
- Home improvement loans offer fixed interest rates and flexible repayment terms, allowing homeowners to spread the cost over time.
- Credit cards can provide short-term financing options but often have higher interest rates compared to dedicated home improvement loans.
- Home equity loans utilize the equity in a homeowner’s property as collateral, potentially offering lower interest rates.
Typical Material Costs (Example – Per Square Foot)
| Siding Type | Approximate Cost (USD) |
|---|---|
| Vinyl | $4-$8 |
| Fiber Cement | $8-$15 |
| Wood | $10-$25 |
| Metal (Steel) | $12-$20 |
Note: These are estimates and can vary widely depending on the specific material, brand, and local market conditions. Consult with contractors for personalized cost breakdowns.
Final Conclusion: Professional Siding Installation
In conclusion, professional siding installation is a multifaceted process demanding careful planning, meticulous execution, and a keen eye for quality. From initial consultation to final inspection, understanding the steps involved and the potential challenges will ensure a successful project. This comprehensive guide provides valuable insights into material selection, installation procedures, and maintenance strategies, enabling homeowners to make informed decisions for their home’s exterior renovation. Ultimately, a professionally installed siding system can enhance your home’s beauty and value while offering long-term protection and peace of mind.